This guide will teach you how to install and configure Linux, NGINX, MySQL/MariaDB, and PHP (LEMP stack) on Debian.
Please disregard the old software versions in this article; they remain as examples, so I recommend you always download the new ones.
- Install Debian Linux distribution:
Download the latest small installation image from https://www.debian.org/distrib/: 64-bit PC netinst iso or 32-bit PC netinst iso and create a bootable USB drive with Rufus; For this example, I will use 64-bit PC netinst iso (debian-12.5.0-amd64-netinst.iso);
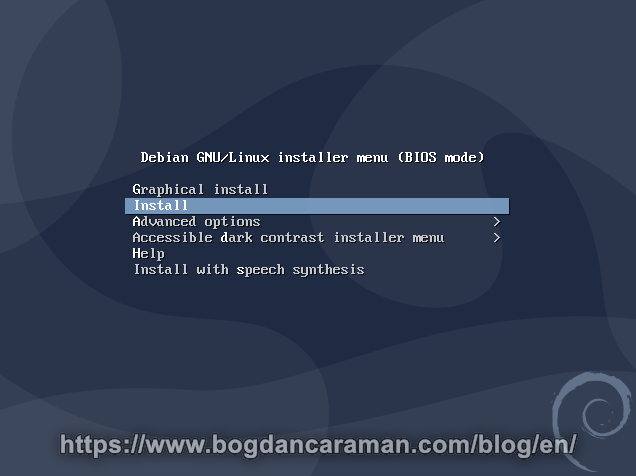
- Boot the system with the Debian USB flash drive and choose Install:
[!!] Select a languageLanguage: English
[!!] Select your locationCountry, territory or area: otherContinent or region: EuropeCountry, territory or area: Romania
[!] Configure localesCountry to base default locale settings on: United States - en_US.UTF-8
[!!] Configure the keyboardKeymap to use: American English or British English #depends on your computer keyboard
[!!] Configure the networkPrimary network interface: enp2s0 #my example
[!] Configure the networkHostname: webserver<Continue>Domain name: example.com<Continue>
[!!] Set up users and passwordsRoot password: rootpassword #create a strong password<Continue>Re-enter password to verify: rootpassword<Continue>
[!!] Set up users and passwords #for non-administrative activitiesFull name for the new user: Bogdan Caraman #my example<Continue>Username for your account: bogdanContinue>Choose a password for the new user: userpassword #create a strong password<Continue>Re-enter password to verify: userpassword<Continue>
[!!] Partition disksPartition method: Guided - use entire diskSelect disk partition: SCSI3 (sda) #my example
[!] Partition disksPartitioning scheme: All files in one partition (recommended for new users)
[!!] Partition disksFinish partitioning and write changes to disk
[!!] Partition disksWrite the changes to disks? <Yes>
Installing the base system
[!] Configure the package managerScan another CD or DVD? <No>
Debian archive mirror country: United States
Debian archive mirror: deb.debian.orgHTTP proxy information (blank for none):<Continue>
Configuring apt
[!] Configuring popularity-contestParticipate in the package usage survey? <No>
[!] Software selectionChoose software to install:[] <unselect all><Continue>
[!] Install the GRUB boot loader on a hard diskInstall the GRUB boot loader to the master boot record? <Yes>Device for boot loader installation: /dev/sda
[!] Finish the installation
- Remove the bootable USB Stick or installation media
<Continue>
Debian GNU/Linux 12 webserver tty1webserver login: root
rootpassword
- Install the SSH Server:
- search software package:
root@webserver:~# apt updateroot@webserver:~# apt-cache policy openssh-serveropenssh-server:Installed: (none)Candidate: 1:9.2p1-2+deb12u2Version table:1:9.2p1-2+deb12u2 500500 http://deb.debian.org/debian bookworm/main amd64 Packages500 http://security.debian.org/debian-security bookworm-security/main amd64 Packages
- install software package:
root@webserver:~# apt install openssh-serverDo you want to continue? [Y/n] Y
- (Optional) Enable SSH root login on the Debian Linux Server:
- make a backup of the original sshd_config file:
root@webserver:~# cp /etc/ssh/sshd_config /etc/ssh/sshd_config.backup-original
- edit sshd_config and add PermitRootLogin yes:
root@webserver:~# nano /etc/ssh/sshd_config
# Authentication:#LoginGraceTime 2m#PermitRootLogin prohibit-passwordPermitRootLogin yes#StrictModes yes#MaxAuthTries 6#MaxSessions 10
^X Exit | Save modified buffer? Y Yes | File Name to Write: /etc/ssh/sshd_config Enter
root@webserver:~# /etc/init.d/ssh restartRestarting ssh (via systemctl): ssh.service.
- find the current IP address of the server:
~# ip -4 a
inet 192.168.1.15/24 brd 192.168.1.255 scope global dynamic enp2s0
we found our DHCP IP address 192.168.1.15
Now you can connect to your server from another computer with PuTTY by the current IP address.
- configuring the interface manually by changing DHCP with a static IP address:
root@webserver:~# nano /etc/network/interfaces# The loopback network interfaceauto loiface lo inet loopback# The primary network interfaceallow-hotplug enp2s0iface enp2s0 inet dhcp# This is an autoconfigured IPv6 interfaceiface enp2s0 inet6 auto
will change with:
# The loopback network interfaceauto loiface lo inet loopback# The primary network interfaceallow-hotplug enp2s0iface enp2s0 inet staticaddress 192.168.1.120netmask 255.255.255.0
gateway 192.168.1.1
# This is an autoconfigured IPv6 interfaceiface enp2s0 inet6 auto
^X Exit | Save modified buffer? Y Yes | File Name to Write: /etc/network/interfaces Enter
192.168.1.1 is your router address from where you should add 192.168.1.120 for Port forwarding of 80 HTTP and 443 HTTPS
root@webserver:~# reboot your server for the changes to take effect
- Prevent suspending when the lid is closed (for laptops):
root@webserver:~# nano /etc/systemd/logind.conf#HandleLidSwitch=suspendHandleLidSwitch=ignore#HandleLidSwitchExternalPower=suspend#HandleLidSwitchDocked=ignoreHandleLidSwitchDocked=ignore#PowerKeyIgnoreInhibited=no
^X Exit | Save modified buffer? Y Yes | File Name to Write: /etc/systemd/logind.conf Enter
- Disable suspend and hibernation:
root@webserver:~# systemctl mask sleep.target suspend.target hibernate.target hybrid-sleep.targetCreated symlink /etc/systemd/system/sleep.target → /dev/null.Created symlink /etc/systemd/system/suspend.target → /dev/null.Created symlink /etc/systemd/system/hibernate.target → /dev/null.Created symlink /etc/systemd/system/hybrid-sleep.target → /dev/null.
- Re-enable suspend and hibernation
root@webserver:~# systemctl unmask sleep.target suspend.target hibernate.target hybrid-sleep.targetRemoved /etc/systemd/system/sleep.target.Removed /etc/systemd/system/suspend.target.Removed /etc/systemd/system/hibernate.target.Removed /etc/systemd/system/hybrid-sleep.target.
root@webserver:~# reboot your server for the changes to take effect
- Change the hostname from “webserver” to anything else:
root@webserver:~# nano /etc/hostname
change the webserver name to anything you want. For this demonstration, I didn’t change mine
root@webserver:~# hostnamewebserverroot@webserver:~# hostname -f (long hostname FQDN)webserver.example.comroot@webserver:~#
- Configure the Hostname for your domain (www.example.com):
root@webserver:~# nano /etc/hosts127.0.0.1 localhost127.0.1.1 webserver.example.com webserveryour IP Static example.com www.example.com# The following lines are desirable for IPv6 capable hosts::1 localhost ip6-localhost ip6-loopbackff02::1 ip6-allnodesff02::2 ip6-allrouters
If you are using Cloudflare and your domain name is hosted there skip this step.
I chose Cloudflare for the SSL/TLS certificates and to run my websites through HTTPS. Let’s Encrypt (certbot) or Comodo Free SSL Certificate (valid for 30 days) are alternatives, but till now my favorite remains Cloudflare.
Instead of IP Static, you can also choose a Dynamic DNS to automatically updating your name server in the Domain Name Server (DNS), for this you don’t need to modify the hosts file anymore.
- Synchronize the System Clock with an NTP (network time protocol) server over the Internet:
root@webserver:~# apt update
root@webserver:~# apt-cache policy ntp
Installed: (none)
Candidate: 1:4.2.8p15+dfsg-2~1.2.2+dfsg1-1+deb12u1
Version table:
1:4.2.8p15+dfsg-2~1.2.2+dfsg1-1+deb12u1 500
500 http://deb.debian.org/debian bookworm/main amd64 Packages
500 http://security.debian.org/debian-security bookworm-security/main amd64 Packages
root@webserver:~# apt install ntpDo you want to continue? [Y/n]
- Keeping your Debian system up-to-date:
root@webserver:~# apt udpate (updating the package database)root@webserver:~# apt upgrade (upgrade the installed packages)root@webserver:~# apt full-upgrade (perform a complete upgrade)
- How to clean your system with apt-get:
root@webserver:~# apt clean (removes those retrieved package files that have a newer version now, and so won’t be used anymore)root@webserver:~# apt autoclean (it removes libraries and packages that were installed automatically to satisfy the dependencies of another installed package)root@webserver:~# apt autoremove (cleaning a Linux system)
- Adjust the Firewall:
If you use iptables to filter connections to your system, you’ll need to open HTTP (80), HTTPS (443), and SSH (22) ports.
Open the necessary ports by issuing the following command:
root@webserver:~# iptables -A INPUT -p tcp --dport 22 -j ACCEPTroot@webserver:~# iptables -A INPUT -p tcp --dport 80 -j ACCEPTroot@webserver:~# iptables -A INPUT -p tcp --dport 443 -j ACCEPT
To see the effective rules:root@webserver:~# iptables -Lroot@webserver:~# iptables -t nat -L
Save IPtables Rules to a File:root@webserver:~# iptables-save > ~/iptables.rules
After ~# reboot you can restore IPtables rules from the file with:root@webserver:~# iptables-restore < ~/iptables.rules
Install the Nginx (Engine X) web server, MariaDB database management, and PHP by using the packages available in the Debian Package archive.
- Install and configure Nginx:
root@webserver:~# apt update (update the Debian repository information)root@webserver:~# apt-cache policy nginx (find out if a specific program is installed)
nginx:
Installed: (none)
Candidate: 1.22.1-9
Version table:
1.22.1-9 500
500 http://deb.debian.org/debian bookworm/main amd64 Packagesroot@webserver:~# apt install nginx (install the software package)Do you want to continue? [Y/n]root@webserver:~# nginx -v find the version number of the nginx installednginx version: nginx/1.22.1
- backup the original nginx.conf file:
root@webserver:~# cp /etc/nginx/nginx.conf /etc/nginx/nginx.conf.backup-original
- Disable Server Tokens. Disabling server tokens makes it more difficult to determine NGINX’s version:
root@webserver:~# nano /etc/nginx/nginx.conf...http {...# server_tokens off;
change it toserver_tokens off;
^X Exit | Save modified buffer? Y Yes | File Name to Write: /etc/nginx/nginx.conf Enter
Now all 404 Not Found missing webpages with nginx 1.22.1 will show only 404 Not Found – nginx
Set the site’s root directory:
- create the directory for example.com
root@webserver:~# mkdir -p /var/www/example.com/root@webserver:~# cd /var/www/example.comroot@webserver:/var/www/example.com# ls -la long format list (permissions, ownership, size and modification date) of all filestotal 8drwxr-xr-x 2 root root 4096 Mar 22 08:05 .drwxr-xr-x 4 root root 4096 Mar 22 08:05 ..root@webserver:/var/www/example.com#
- create a sample index.html page
root@webserver:~# nano /var/www/example.com/index.html<html><head><title>Welcome to example.com!</title></head><body><h1>Success! The example.com server block is working!</h1></body></html>
^X Exit | Save modified buffer? Y Yes | File Name to Write: /var/www/example.com/index.html Enter
In order for Nginx to serve this content, it’s necessary to create a server block with the correct directives. Instead of modifying the default configuration file directly, let’s make a new one at /etc/nginx/sites-available/example.com:
root@webserver:~# nano /etc/nginx/sites-available/example.comserver {listen 80;listen [::]:80;server_name example.com www.example.com;root /var/www/example.com;index index.html index.htm index.nginx-debian.html;location / {try_files $uri $uri/ =404;}}
- enable the file by creating a link from it to the sites-enabled directory, which Nginx reads from during startup:
root@webserver:~# ln -s /etc/nginx/sites-available/example.com /etc/nginx/sites-enabled/
root@webserver:~# nginx -t (test the configuration file: nginx checks the configuration for correct syntax, and then tries to open files referred in the configuration)nginx: the configuration file /etc/nginx/nginx.conf syntax is oknginx: configuration file /etc/nginx/nginx.conf test is successful
root@webserver:~# systemctl restart nginx (restarting nginx service)
From your Desktop computer open the favorite browser and type your example.com address or IP address to see your first HTML test page. To upload your webpage at /var/www/example.com/ you can use WinSCP (a free and open-source SFTP, FTP client for Microsoft Windows) and connect with the root user name and rootpassword. Make sure to have PermitRootLogin yes on your /etc/ssh/ssd_config file.
- Enabling HTTPS on your server:
- install OpenSSL:
root@webserver:~# apt update
root@webserver:~# apt-cache policy openssl
openssl:
Installed: (none)
Candidate: 3.0.11-1~deb12u2
Version table:
3.0.11-1~deb12u2 500
500 http://deb.debian.org/debian bookworm/main amd64 Packages
500 http://security.debian.org/debian-security bookworm-security/main amd64 Packages
root@webserver:~# apt install openssl
- Managing Cloudflare Origin CA certificates (in my case) or use alternatives like Let’s Encrypt (certbot) or Comodo Free SSL Certificate (valid for 30 days);
- Generate a free TLS certificate signed by Cloudflare to install on your origin server;
- Choose how long before your certificate expires: 30 days or more;
- Save both the private key and certificate below to your web server;
- Origin Certificate save it to example.com.pem
- A private key save it to example.com.key
- copy the files to the server or you can paste the codes as below:
root@webserver:~# nano /etc/ssl/certs/example.com.pem Paste the PEM code there and save the fileroot@webserver:~# nano /etc/ssl/private/example.com.key Paste the private key and save the file
- Edit the Nginx virtual host file and add the following lines to:
root@webserver:~# nano /etc/nginx/sites-available/example.comserver {listen 80;listen [::]:80;
listen 443;listen [::]:443;
ssl on;ssl_certificate /etc/ssl/certs/example.com.pem;ssl_certificate_key /etc/ssl/private/example.com.key;
server_name example.com www.example.com;root /var/www/example.com;index index.html index.htm index.nginx-debian.html;location / {try_files $uri $uri/ =404;}}
^X Exit | Save modified buffer? Y Yes | File Name to Write: /etc/nginx/sites-available/example.com Enter
- test configuration file:
root@webserver:~# nginx -tnginx: the configuration file /etc/nginx/nginx.conf syntax is oknginx: configuration file /etc/nginx/nginx.conf test is successful
- restart Nginx:
root@webserver:~# systemctl restart nginx
From now on, the address of the web page will be changed in https://example.com when you type it from your favorite browser.
- Install and configure MariaDB:
root@webserver:~# apt update (update the Debian repository information)root@webserver:~# apt-cache policy mariadb-server (find out if a specific program is installed)
mariadb-server:
Installed: (none)
Candidate: 1:10.11.6-0+deb12u1
Version table:
1:10.11.6-0+deb12u1 500
500 http://deb.debian.org/debian bookworm/main amd64 Packagesroot@webserver:~# apt install mariadb-server (install the software package)Do you want to continue? [Y/n]root@webserver:~# systemctl status mariadb (check the status of MariaDB)● mariadb.service - MariaDB 10.11.06 database serverLoaded: loaded (/lib/systemd/system/mariadb.service; enabled; vendor preset:Active: active (running) since Fri 2024-03-22 08:20:24 EET; 10s ago
- improve the security of your MariaDB installation:
root@webserver:~# mysql_secure_installation
NOTE: RUNNING ALL PARTS OF THIS SCRIPT IS RECOMMENDED FOR ALL MariaDB SERVERS IN PRODUCTION USE! PLEASE READ EACH STEP CAREFULLY!
In order to log into MariaDB to secure it, we’ll need the current
password for the root user. If you’ve just installed MariaDB, and
you haven’t set the root password yet, the password will be blank,
so you should just press enter here.
We don’t have to change the MySQL root password as we just set a new one during installation.
Answer the questions as follows:
Enter current password for root (enter for none):
OK, successfully used password, moving on…
Setting the root password or using the unix_socket ensures that nobody can log into the MariaDB root user without the proper authorisation.
You already have root account protected, so you can safely answer ‘n’.
Switch to unix_socket authentication [Y/n] n
… skipping.
You already have root account protected, so you can safely answer ‘n’.
Change the root password? [Y/n] YNew password: MySQL root passwordRe-enter new password: MySQL root passwordRemove anonymous users? <Y>Disallow root login remotely? <Y>Remove test database and access to it? <Y>Reload privilege tables now? <Y>Cleaning up...All done! If you've completed all of the above steps, your MariaDBinstallation should now be secure.Thanks for using MariaDB!
- show databases list from MariaDB:
root@webserver:~# mysql -u root -pEnter password: MySQL root passwordMariaDB [(none)]> SHOW DATABASES;
Database
information_schema
mysql
performance_schema
- show users list from MariaDB:
MariaDB [(none)]> SELECT User FROM mysql.user;
User
root
- create a database in MariaDB:
MariaDB [(none)]> create database db1;
- create a user in MariaDB for db1:
MariaDB [(none)]> GRANT ALL ON db1.* TO administrator_db1 IDENTIFIED BY "administratorpasswordfordb1";
MariaDB [(none)]> DROP USER administrator_db1;
MariaDB [(none)]> DROP DATABASE db1;
- to quit from MariaDB:
MariaDB [(none)]> quit
Byeroot@webserver:~#
- exporting a single database and the user using mysqldump:
root@webserver:~# mysqldump -u administrator_db1 -p db1 > backup-db1.sqlEnter password: administratorpasswordfordb1
- check if it’s a legitimate SQL dump file:
root@webserver:~# head -n 5 backup-db1.sql
- delete MySQL Shell History and Bash History:
root@webserver:~# cat /dev/null > ~/.mysql_historyroot@webserver:~# cat /dev/null > ~/.bash_history
- Install PHP with FastCGI Process Manager (FPM):
root@webserver:~# apt update (update the Debian repository information)root@webserver:~# apt install php-fpmDo you want to continue? [Y/n]
- install an additional package:
root@webserver:~# apt install php-mysqlDo you want to continue? [Y/n]root@webserver:~#
- verify your default PHP version used on your system:
root@webserver:~# php -v
PHP 8.2.7 (cli) (built: Jun 9 2023 19:37:27) (NTS)
Copyright (c) The PHP Group
Zend Engine v4.2.7, Copyright (c) Zend Technologies
with Zend OPcache v8.2.7, Copyright (c), by Zend Technologies
- show PHP version information:
root@webserver:~# apt show phproot@webserver:~# apt show php -a
- Configure Nginx to Use the PHP Processor:
root@webserver:~# nano /etc/nginx/sites-available/example.comserver {listen 80;listen [::]:80;
listen 443;listen [::]:443;
ssl on;ssl_certificate /etc/ssl/certs/example.com.pem;ssl_certificate_key /etc/ssl/private/example.com.key;
server_name example.com www.example.com;
root /var/www/example.com;index index.php index.html index.htm index.nginx-debian.html;
location / {try_files $uri $uri/ =404;}
location ~ \.php$ {include snippets/fastcgi-php.conf;fastcgi_pass unix:/var/run/php/php8.2-fpm.sock;}
location ~ /\.ht {deny all;}
}
- when you’ve made the above changes, you can save and close the file:
^X Exit | Save modified buffer? Y Yes | File Name to Write: /etc/nginx/sites-available/example.com Enter
root@webserver:~# nginx -t (test the configuration file: nginx checks the configuration for correct syntax, and then tries to open files referred in the configuration)nginx: the configuration file /etc/nginx/nginx.conf syntax is oknginx: configuration file /etc/nginx/nginx.conf test is successful
root@webserver:~# systemctl restart nginx (restarting nginx service)
- create a PHP file to test configuration:
root@webserver:~# nano /var/www/example.com/info.php
- paste the following code:
<?php// Show all information, defaults to INFO_ALLphpinfo();?>
^X Exit | Save modified buffer? Y Yes | File Name to Write: /var/www/example.com/info.php Enter
Open your favorite browser and type www.example.com/info.php or your static IP address to see a web page that has been generated by PHP with information about your server.
- remove the info.php file by typing:
root@webserver:~# rm /var/www/example.com/info.php
- configure the PHP processor:
root@webserver:~# cp /etc/php/8.2/fpm/php.ini /etc/php/7.3/fpm/php.ini.backup-original backup original php.iniroot@webserver:~# nano /etc/php/8.2/fpm/php.ini edit the php.ini file
find and change the date.timezone with your region:
date.timezone = Europe/Bucharest
- restart PHP
root@webserver:~# systemctl restart php8.2-fpmroot@webserver:~# exit
~The End~
You can find the latest version of Debian at https://www.debian.org