Method 1 of 3
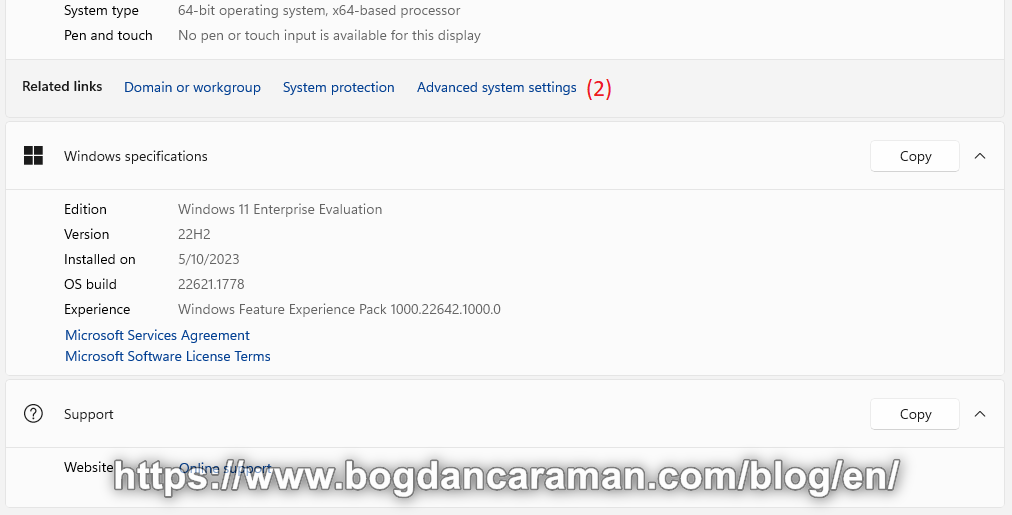
- Press Windows Key +I on your keyboard to open Settings in Windows 11 then click the About tab (1);

- Select Advanced system settings (2);
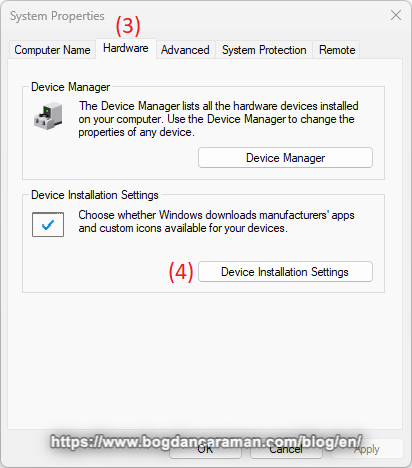
- Switch to the Hardware (3) tab;
- Click on the Device Installation Settings (4) button;
- Select the No (your device might not work as expected) (5) radio button to disable automatic driver downloads;
- Click the Save Changes (6) button;

Method 2 of 3 (Windows Registry)
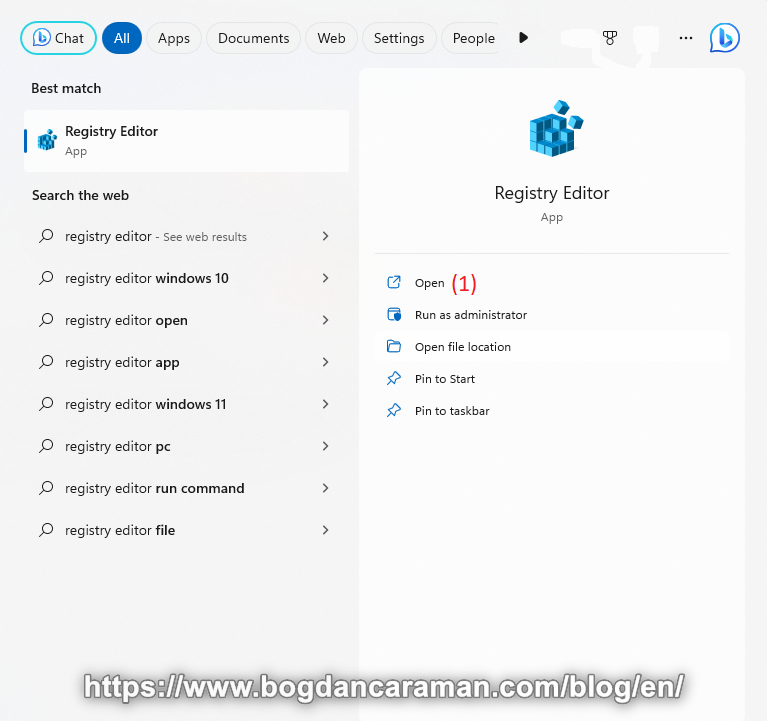
- Press the Windows + S keys to open the Windows Search;
- In the search bar, type Registry Editor and choose Open (1) from the right pane;
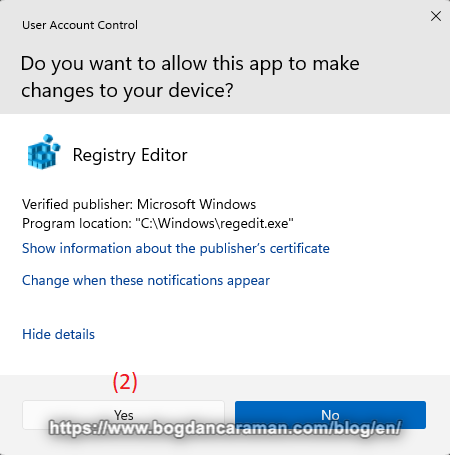
3. User Account Control, Do you want to allow this app to make changes to your device? Click Yes (2);
- Go to the following key: Computer\HKEY_LOCAL_MACHINE\SOFTWARE\Microsoft\Windows\CurrentVersion\DriverSearching (3) then double-click on SearchOrderConfig (4);

- Change the value to 0. Click the OK button;

- Close the Registry Editor then reboot your PC to apply the change.
Method 3 of 3 (Edit group policy, available for Windows 11 Pro or Windows Enterprise)
- Press the Windows + S keys to open the Windows Search;
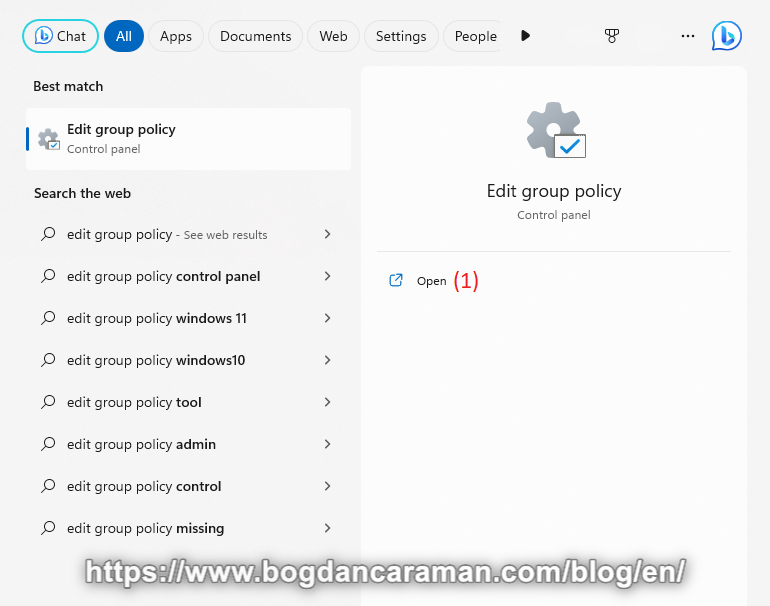
- In the search bar, type Edit group policy and choose Open (1) from the right pane;
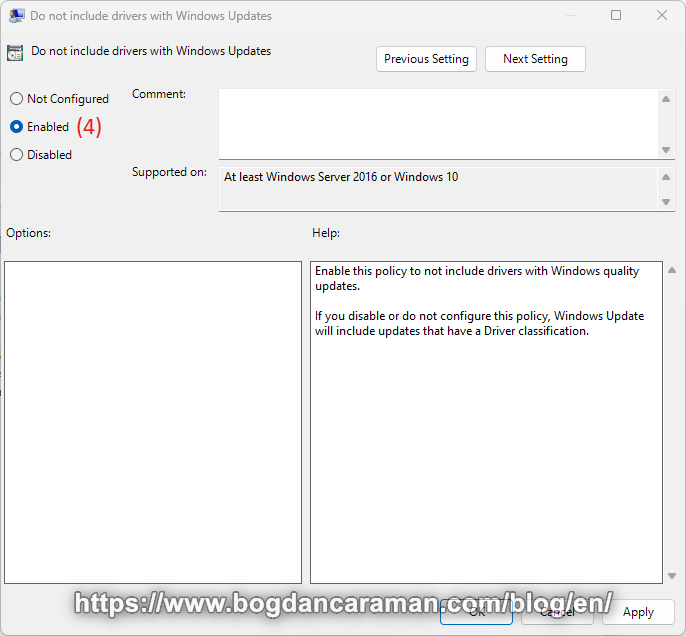
- In the Group Policy Editor, navigate to Computer Configuration > Administrative Templates > Windows Components > Windows Update > Manage updates offered from Windows Update (2) then double-click on Do not include drivers with Windows Updates (3);
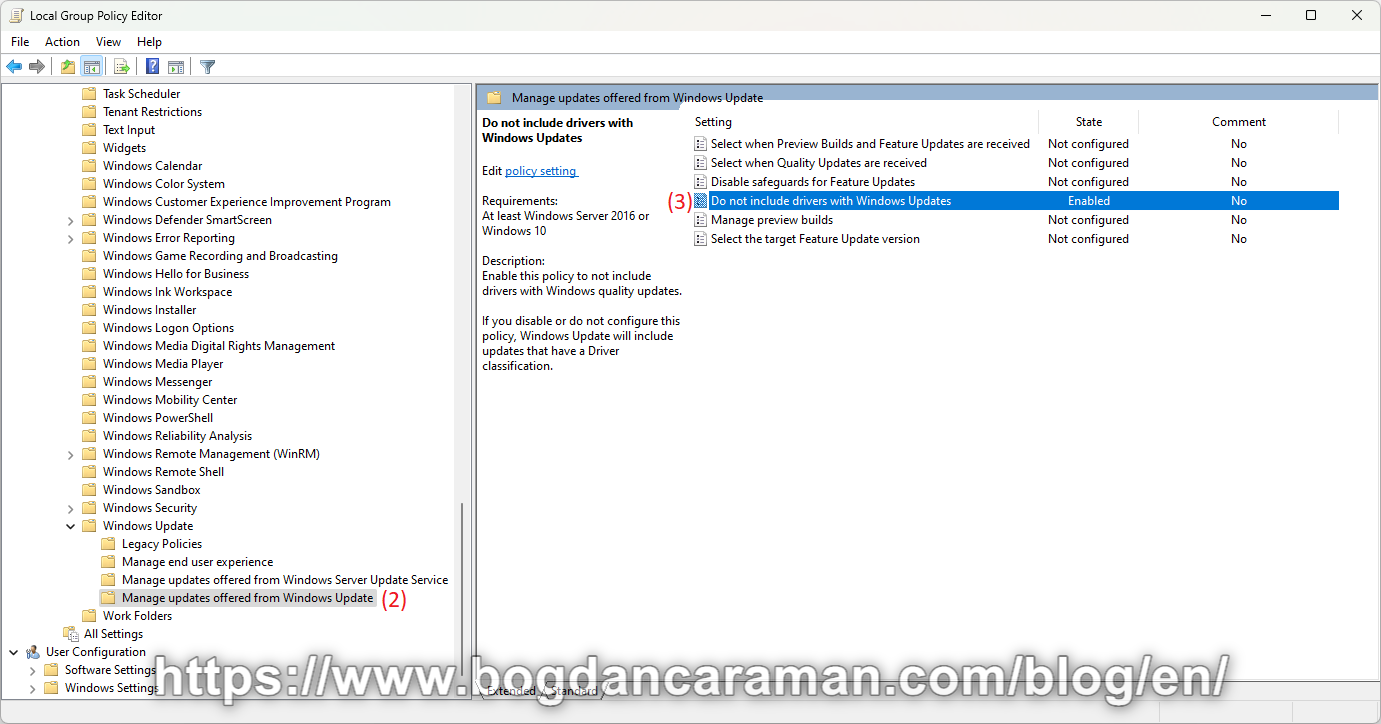
- Select the Enabled (4) option and then click the Apply button.