Webmasters use MySQL to run the databases of the created websites. The installation is quite complex and I will show you the steps by installing MySQL on a Windows Server 2019 Standard Evaluation (Desktop Experience) operating system. MySQL is also available for Mac OS X, Linux, or Unix. Before installing MySQL on a new system that will be used as a web server, it is best to install IIS (Internet Information Services) by opening Server Manager where we have Manage, Tools, View, and Help menus. At the View menu, we can hide or reactivate Welcome Tile, for now, it’s set to hide. At Manage we click on Add Roles and Features and for IIS installation on Server Roles select Web Server (IIS), then Add Features and Next after selecting. At Role Services, expand Application Development and select CGI (Common Gateway Interface), this will help us later when will install PHP applications. We still have a final Next and then Install. After adding these roles and features we can start installing MySQL for a web server:
- We are going to the MySQL Community Server website through https://dev.mysql.com/downloads/windows/installer/, where we have available to Download Windows (x86, 32-bit), MSI Installer (mysql-installer-community-… .msi). Although it shows that it is for a 32-bit operating system, the installer also includes both versions, including the 64-bit version;
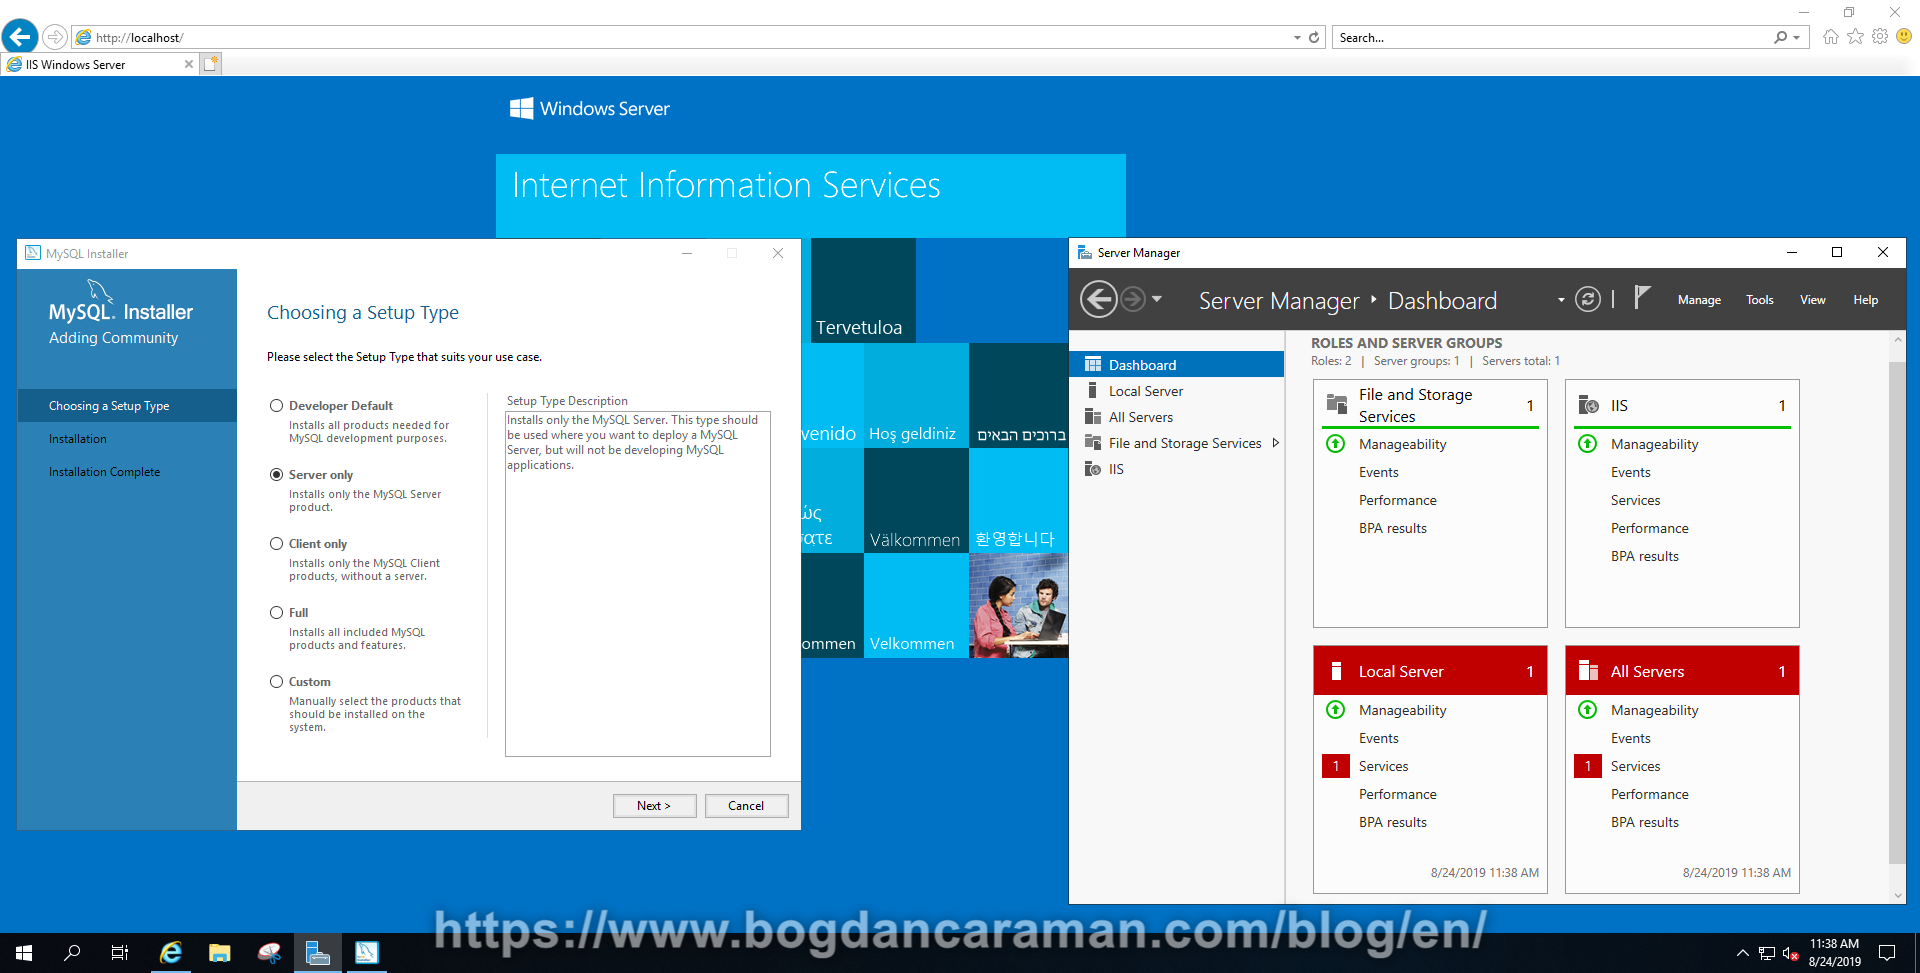
- We are running the installation where first we must accept the License Agreement and at Setup Type, we have 5 types according to the use case: Developer Default, Server Only, Client Only, Full and Custom. At Full we have MySQL Server, MySQL Shell, MySQL Router, MySQL Workbench, MySQL Connectors, documentation, samples and examples, and much more;
- I will choose the Server only. Installs only the MySQL Server. This type should be used where you want to deploy a MySQL Server, but will not be developing MySQL applications. Click Next;
- At Check Requirements, Microsoft Visual C++ 2015 Redistributable Package (x64) must be installed on the new system. It just needs to be selected and this requirement will be solved automatically by the MySQL installer when you click Execute. Accept the license terms and conditions for the Microsoft Visual C++ and Install;
- Click Next after all the requirements have been verified and installed (Status: INSTL DONE);
- You can also go to the latest supported Visual C++ downloads and download the latest version of the Microsoft Visual C++ 2015-2019 Redistributable (x64) – 14.22.278.21 (x64: vc_redist.x64.exe) and install it, but for this, you must abandon the current installation by Cancel the MySQL Installer and when complete the installation of the new version of the Microsoft Visual C++ repeat steps 2 and 3;
- In the next window if the MySQL Server product is there and the message Status Ready click on Execute;
- When the Status is Complete after Next will configure MySQL (Status Ready to configure);
- High Availability: Standalone MySQL Server / Classic MySQL Replication (Choose this option to run the MySQL instance as a standalone database server with the opportunity to configure classic replication later. With this option, you can provide your own high-availability solution, if required); InnoDB Cluster (The InnoDB cluster technology provides an out-of-the-box high availability (HA) solution for MySQL using Group Replication. Note: InnoDB cluster requires a minimum of three MySQL server instances to provide a fully automated HA solution. Members of a cluster should be located such that network communication latency between servers is low); I chose Standalone MySQL Server / Classic MySQL Replication;
- Type and Networking: Config Type Development Computer (This is a development computer, and many other applications will be installed on it. A minimal amount of memory will be used by MySQL); Server Computer (Several server applications will be running on this computer. Choose this option for web or application servers. MySQL will have medium memory usage); Dedicated Computer (This computer is dedicated to running the MySQL database server. No other servers, such as web servers, will be run, MySQL will make use of all available memory); I chose Server Computer; At connectivity, the default port is 3306 and it is recommended to leave this as the default setting because it is the designated port for the most MySQL applications. Only if you create your own applications, you can change the default port and then check the ports for the created applications. X Protocol Port 33060 is used by MySQL as a document store;
- Authentication Method: Use Strong Password Encryption for Authentication (RECOMMENDED); Use Legacy Authentication Method (Retain MySQL 5.x Compatibility);
- Accounts and Roles: will assign the root password through MySQL Root Account Password, Repeat Password, Password strength: Strong; optional you can create MySQL User Accounts;
- Windows Service: On the Windows platform, the MySQL server can run as a named service managed by the operating system and be configured to start up automatically when Windows starts, so we leave the following options checked, Configure MySQL Server as a Windows Service and Start the MySQL Server at System Startup. You can also set the service name, which is useful if you have more than one running MySQL example, I set up Windows Service Name MySQL then Run Windows Service as … Standard System Account;
- Apply Configuration: All configuration settings are applied to the MySQL server when you click Execute and follow them in Configuration Steps: Writing configuration file, Updating Windows Firewall rules, Adjusting Windows service, Initializing database (may take a long time), Starting the server, Applying security settings, updating the Start menu link. Click the Log tab to view the log. If the following message appears “The configuration for MySQL was successful” click Finish to continue;
- Product Configuration: Product MySQL Server, Status Configuration complete, Next;
- Installation Complete. Click Finish;
- MySQL Installer and the installed MySQL products are added to the Microsoft Windows Start menu under the MySQL group.
You can find the latest version of MySQL Community Server at https://dev.mysql.com/downloads/mysql/ through the Download menu.