- Download Windows 11 Disk Image (ISO) from https://www.microsoft.com/en-us/software-download/windows11;
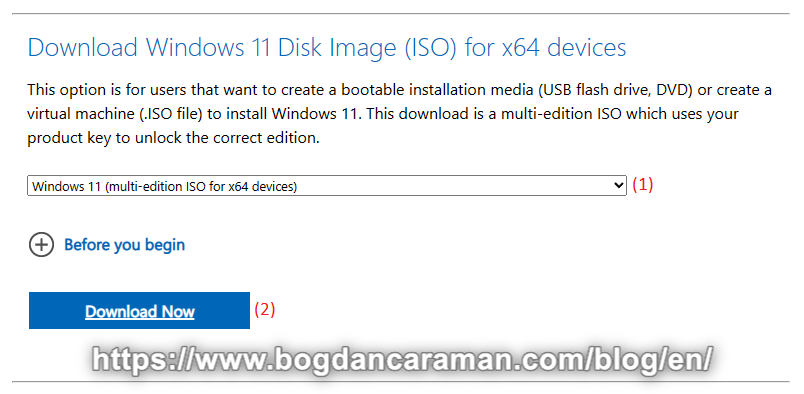
- Select Download Windows 11 (multi-edition ISO for x64 devices) (1) then Download Now (2);
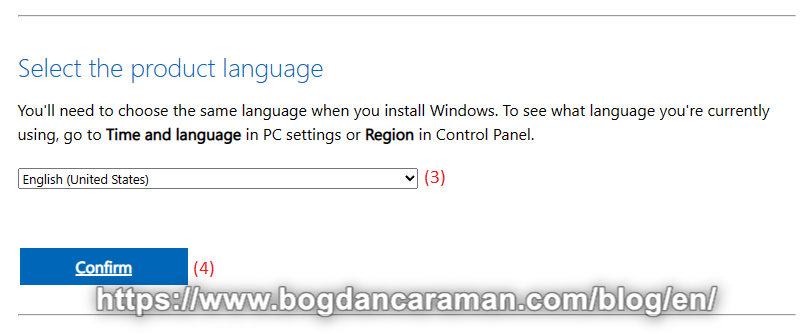
- Select the product language (3) then Confirm (4);
- Our Selected Example: Download – Windows 11 English, click 64-bit Download (5);
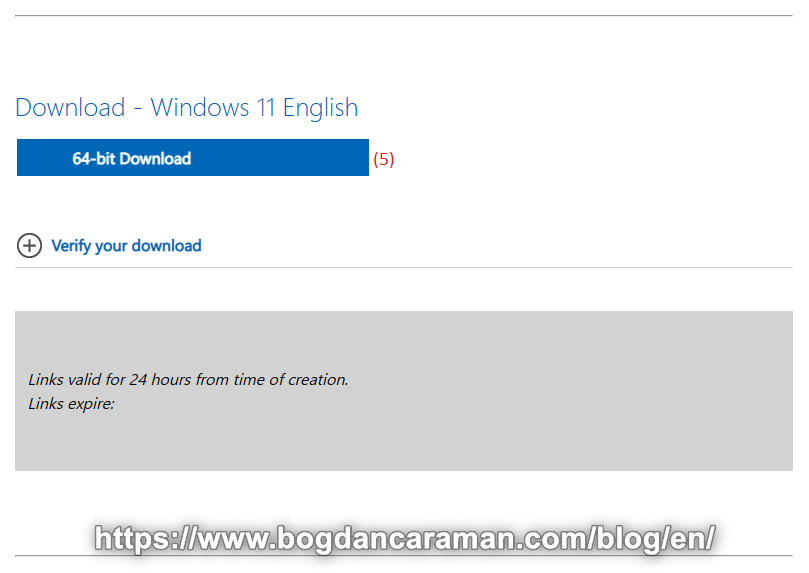
- Win11_24H2_English_x64.iso file will be downloaded on your local computer;
- Download the Rufus Portable from https://rufus.ie/en/;
- Open up Rufus and plug your clean USB stick into your computer;
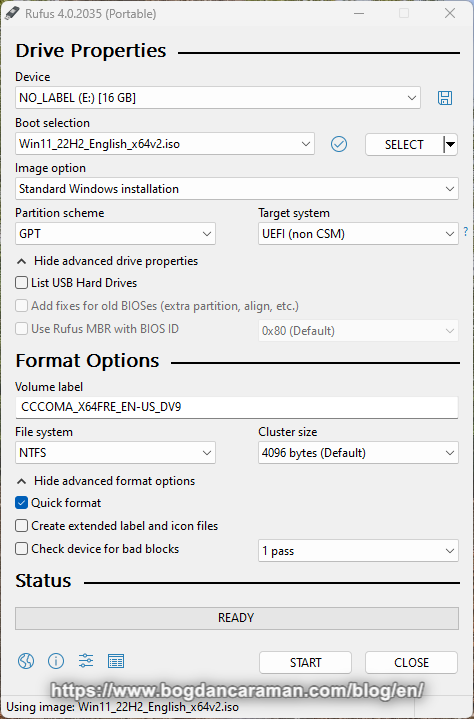
- Rufus will automatically detect your USB. Click on Device and choose the USB you want to use from the drop-down menu;
- Make sure the Boot Selection option is set to Disk or ISO image then click Select. Rufus will open a file explorer browser window; locate the ISO image you want to burn onto the USB and select it (ex: Win11_24H2_English_x64.iso);
- You’ll generally want to create a Standard Windows installation, and Rufus will automatically detect the correct Partition Scheme based on your device, so keep the default settings as they are. However, you can also change these if you want;
- Give the Volume label a name of your choice, or leave it as it is, and once again leave the default settings for File system and Cluster size. Now click START;
- You’ll get a warning saying that any data on the USB will be destroyed (this is normal). Click OK and Rufus will start creating the ISO image on the USB;
- Boot from the USB Drive and let the Windows copy the installation onto the target disk;
- For 10th and 11th Gen Platforms: If you receive “No device drivers were found. Make sure that the installation media contains the correct drivers, and then click OK.” download and extract from Intel® Rapid Storage Technology Driver Installation Software with Intel® Optane™ Memory (10th and 11th Gen Platforms) the latest driver files. Reference: README Text Files (readme_18_7_6_1010.txt) – 6.3 Pre-Installation of INTEL(R) RST driver using the “Load Driver” Method. Copy all drivers to a USB key media;
- Click “Load Driver” to install a third-party SCSI or RAID driver. When prompted, insert the USB media and press Enter. Follow the prompts and browse to the location of the installation files (Ex: …\Drivers\VMD). Select the appropriate ‘.inf’ file (64-bit). If a supported controller is detected there will be no error message. Follow prompts to continue and complete the installation;
- On Windows Setup you can select:
- Language to install: English (United States);
- Time and currency format: English (United States);
- Keyboard or input method: US
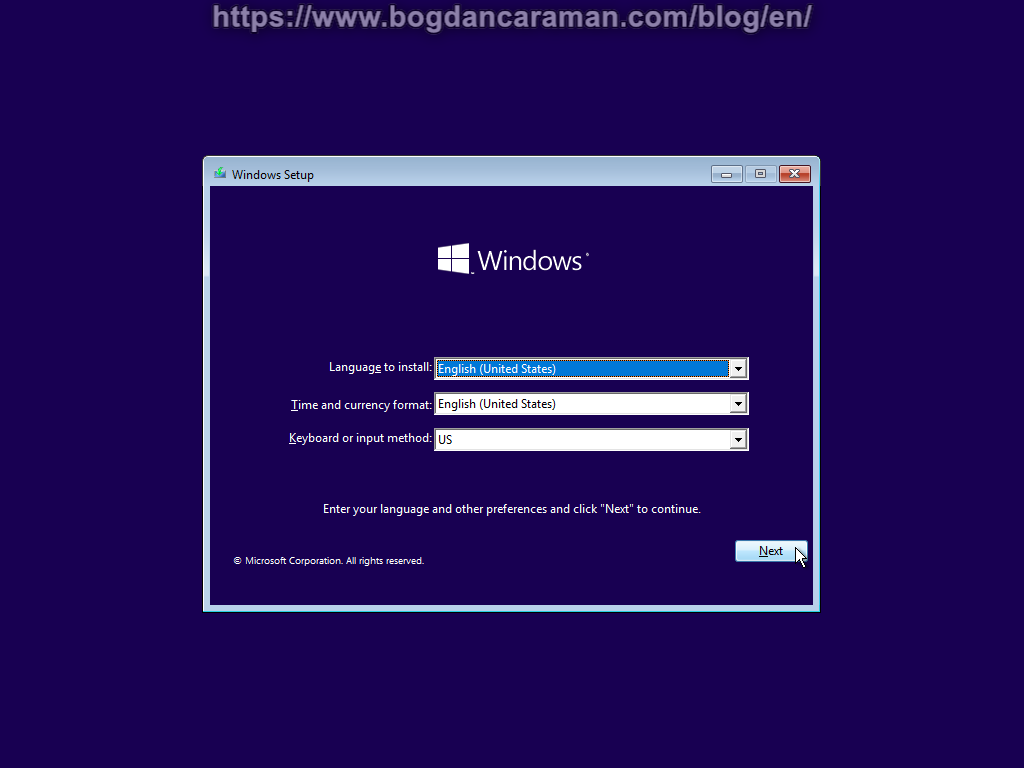
- After you enter your language and preferences click “Next” to continue and then “Install now“;

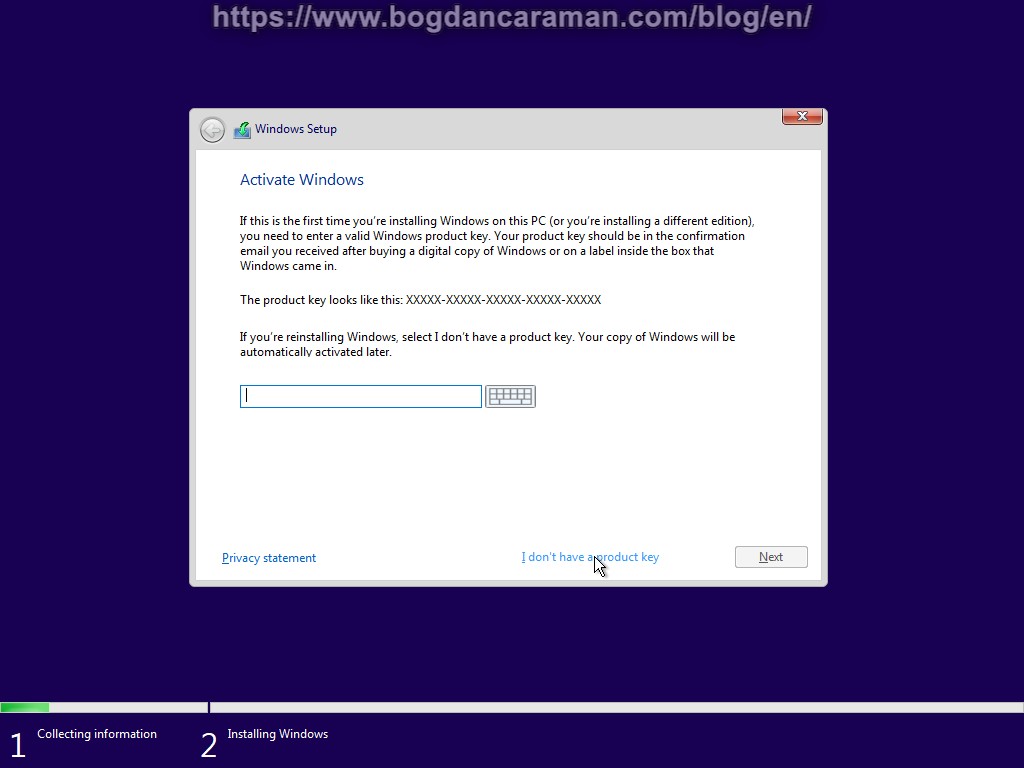
- Enter a valid Windows product key because is the first time you’re installing Windows on your PC/laptop or click “I don’t have a product key” to insert later;
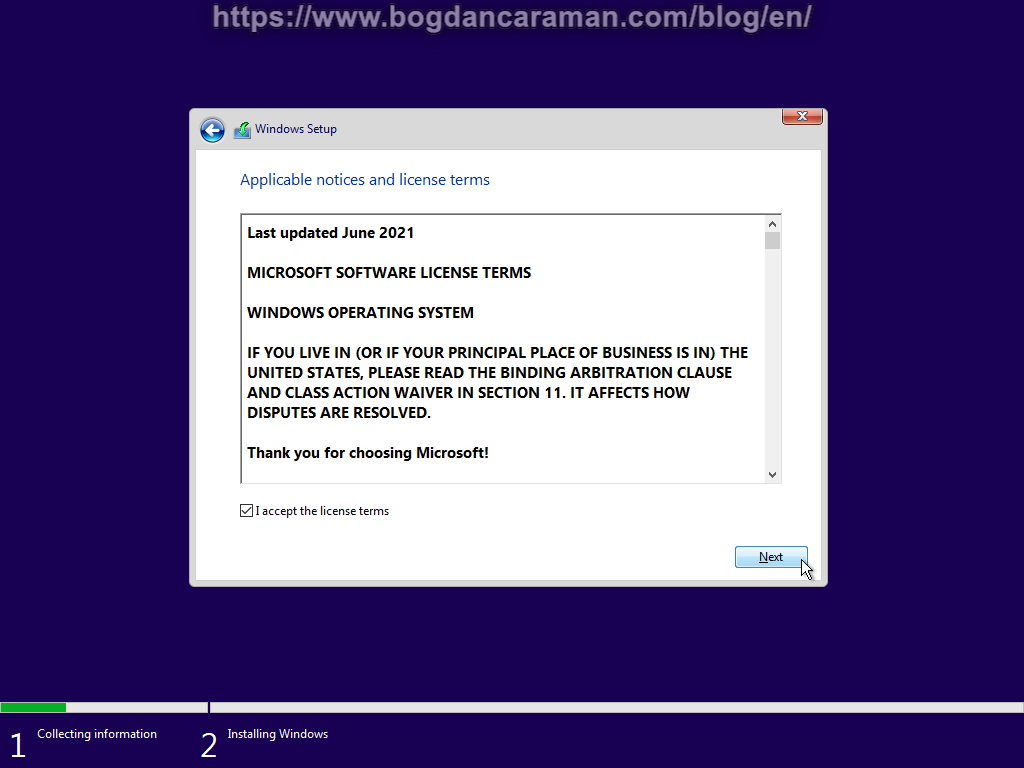
- Accept the license terms and click “Next”;
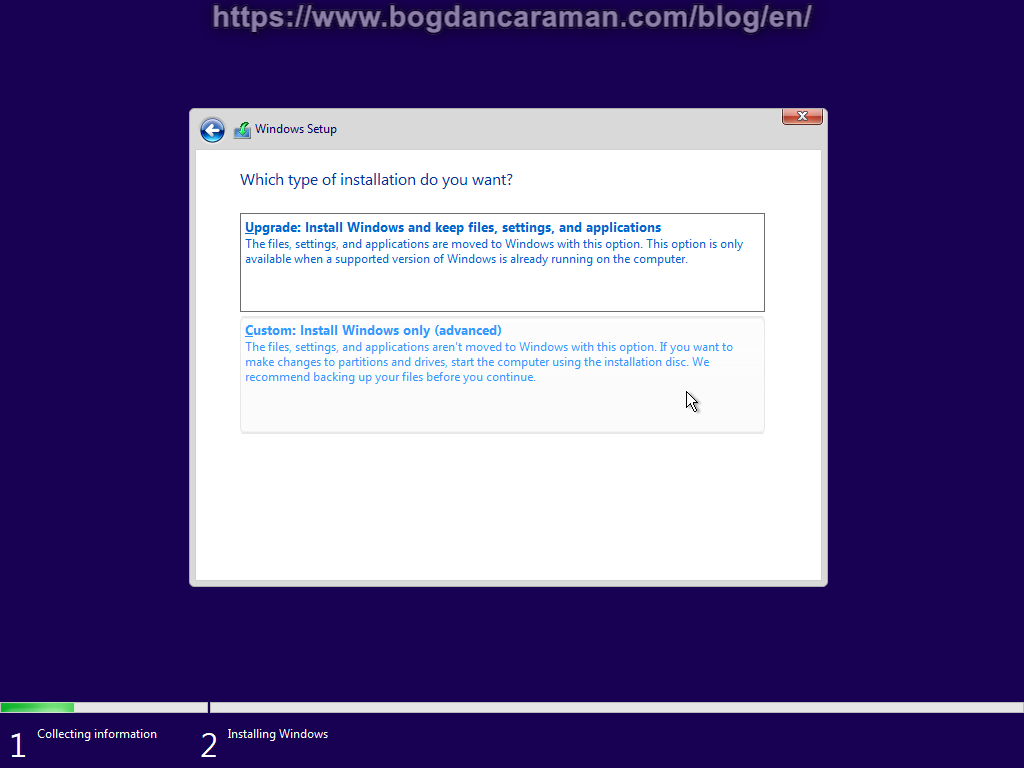
- Which type of installation do you want?
- Upgrade: Install Windows and keep files, settings, and applications. The files, settings, and applications are moved to Windows with this option. This option is only available when a supported version of Windows is already running on the computer;
- Custom: Install Windows only (advanced). The files, settings, and applications aren’t moved to Windows with this option. If you want to make changes to partitions and drives, start the computer using the installation disc. We recommend backing up your files before you continue.
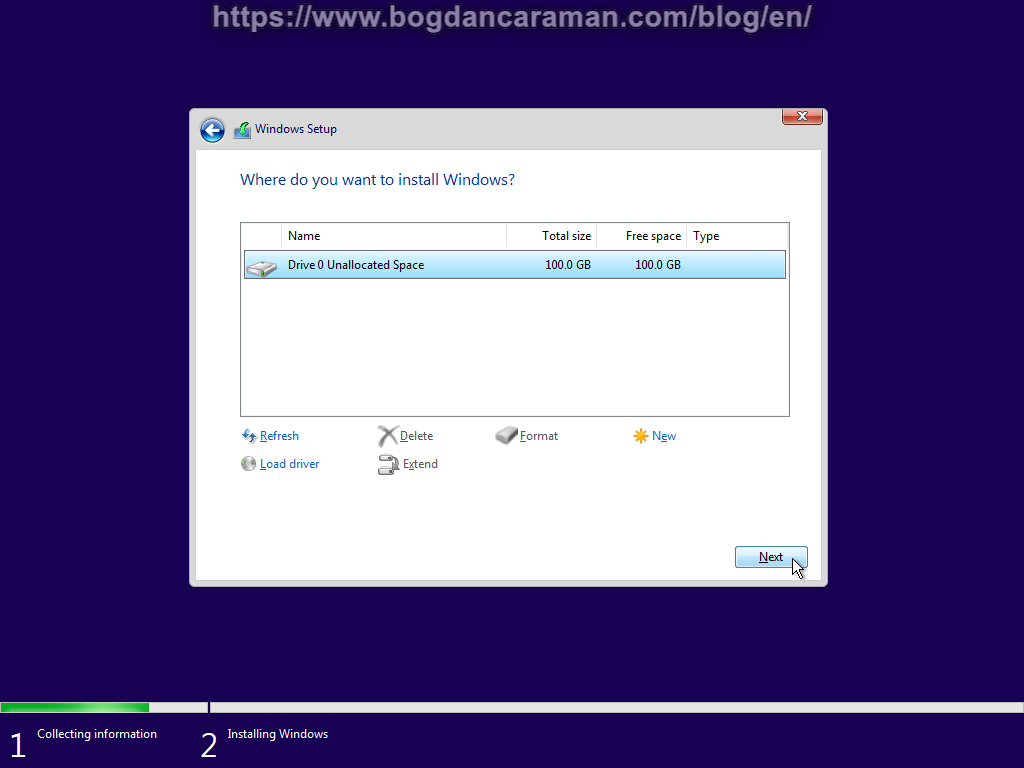
- Where do you want to install Windows? after you select Custom: Install Windows only (advanced):
- If you don’t already have 2 partitions created with partition software then click New to create a partition to install Windows;
- The Windows 11 system requires Hard disk space: 64 GB, but you can choose more space because you will install other software too on that partition. I only recommend the second partition for the BACKUP files if you don’t have an external HDD/SSD;
- Select the operating system you want to install: Ex. Windows 11 Pro
- Wait till Installing Windows: Copying Windows files, Getting files ready for installation, Installing features, Installing updates, Finishing up;

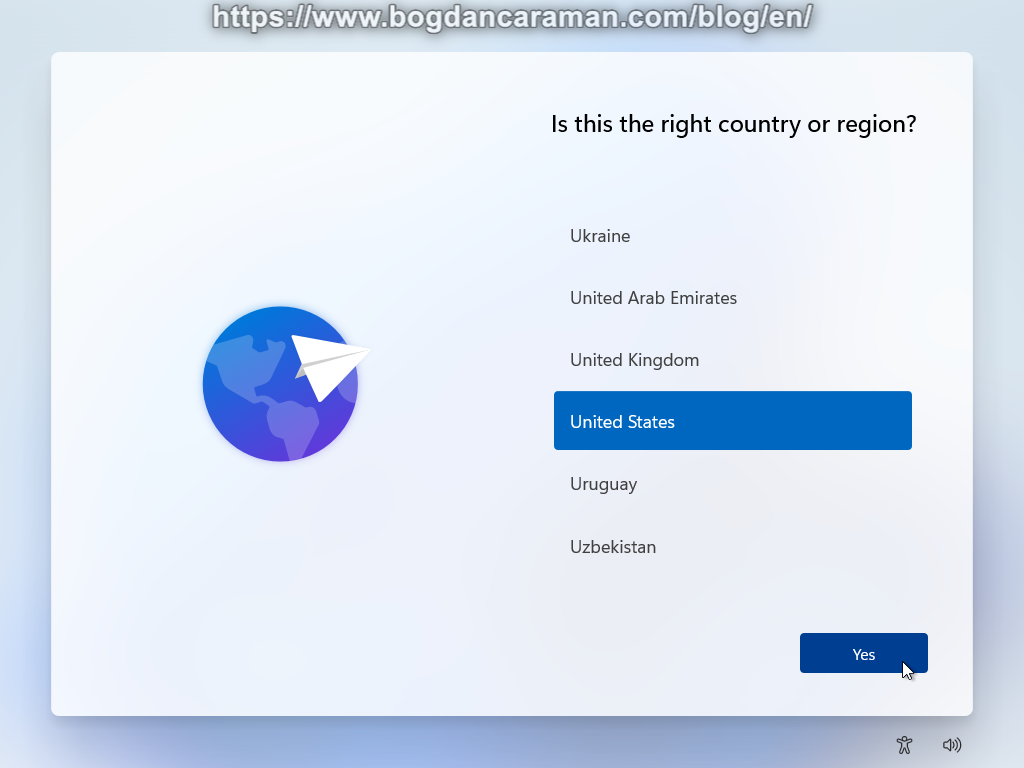
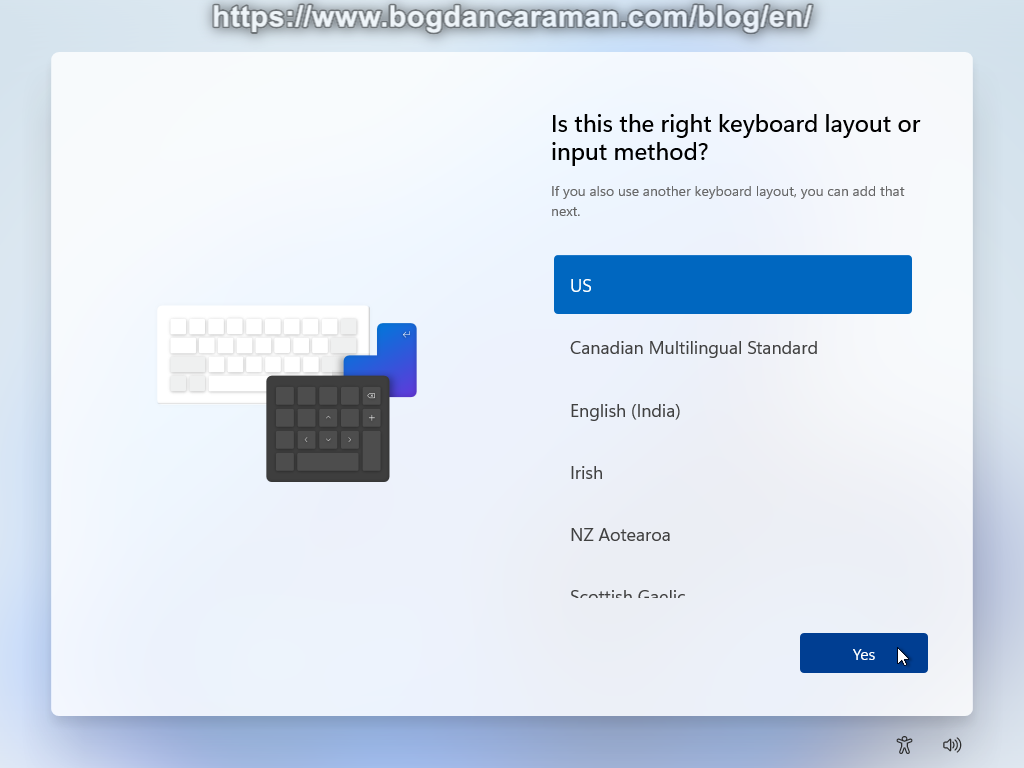
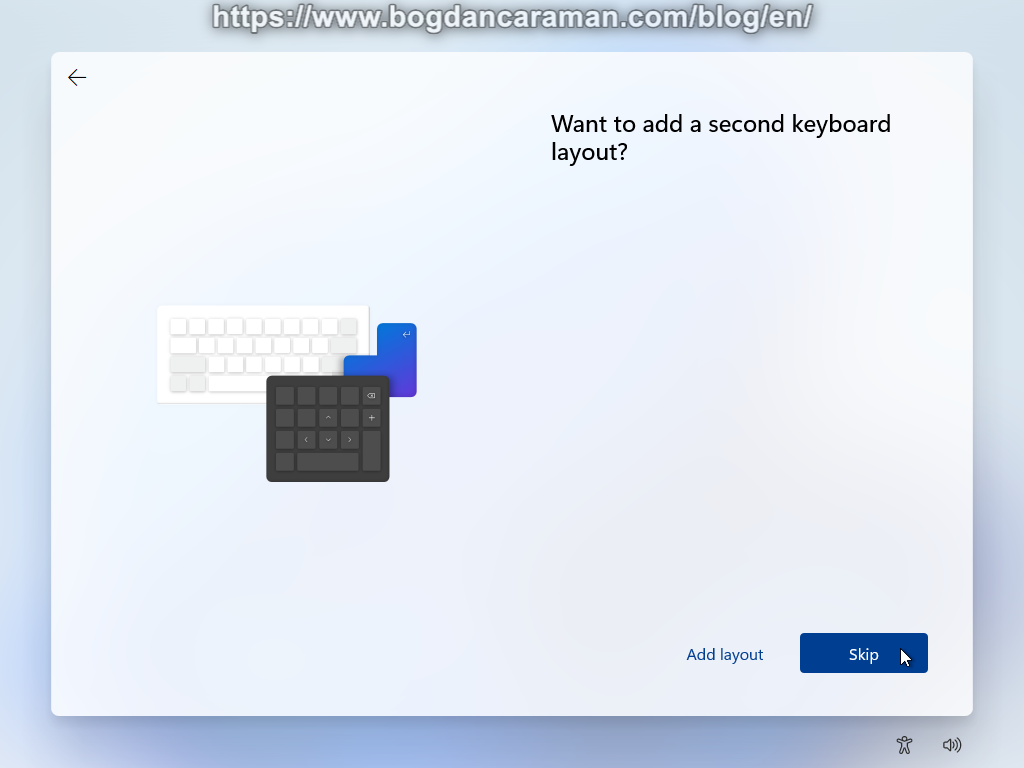
- Setup the Basics;
- region;
- keyboard layout, or input method;
- add a second keyboard layout;
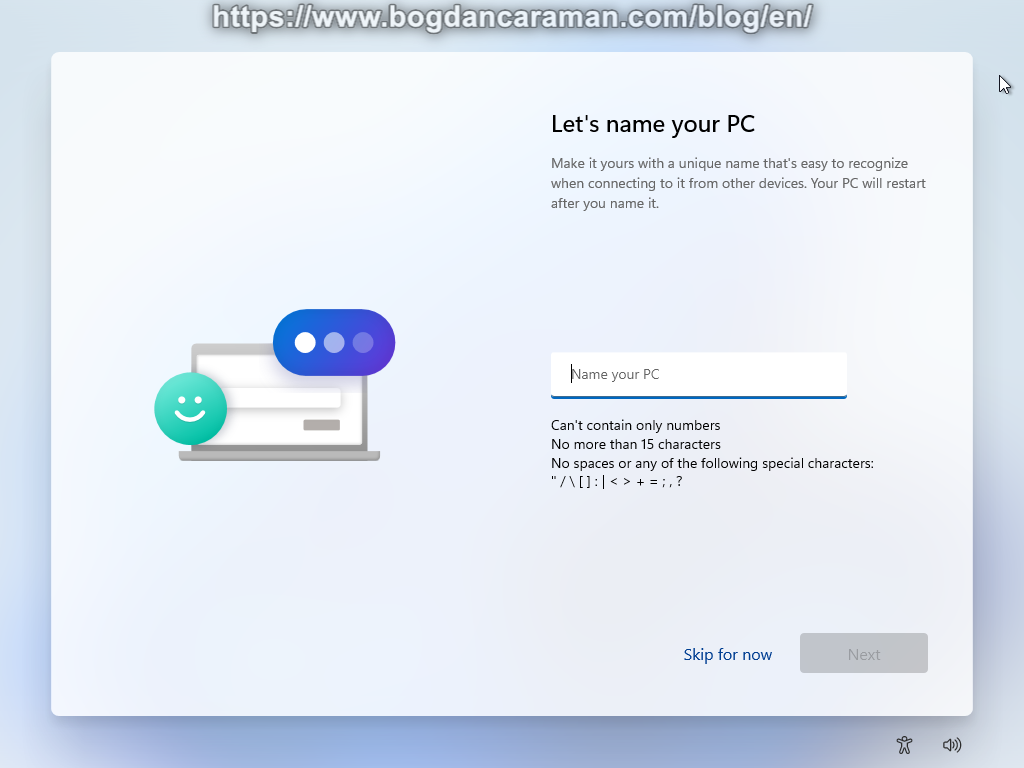
- let’s name your PC;
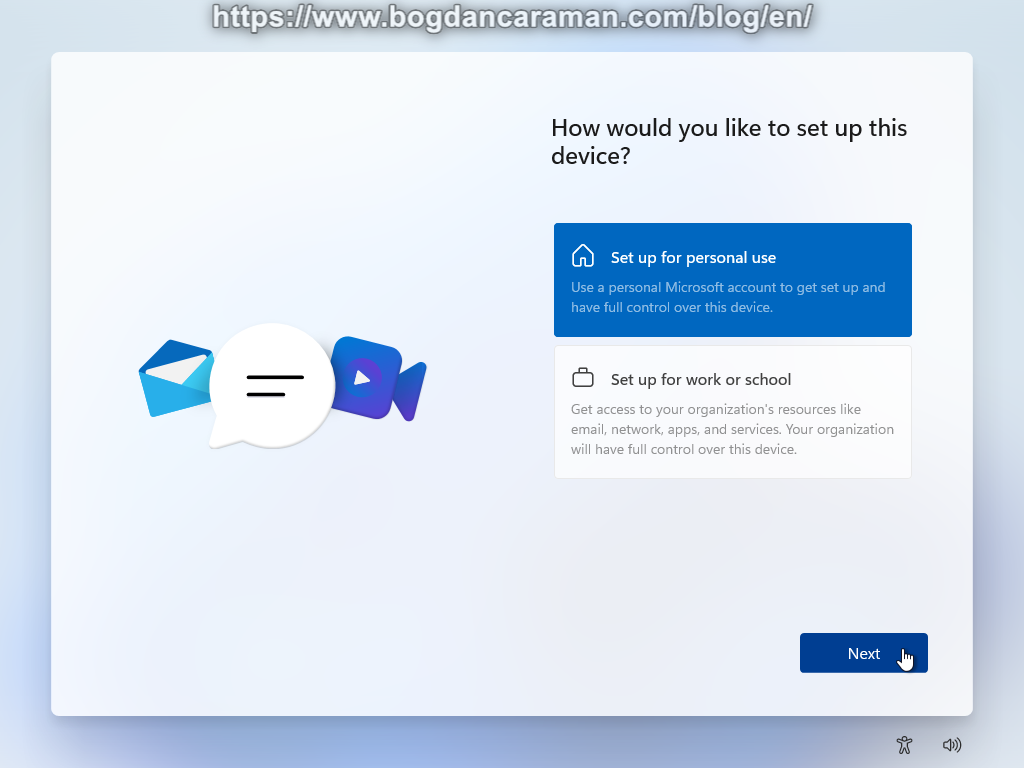
- set up for personal use or set up for work or school;
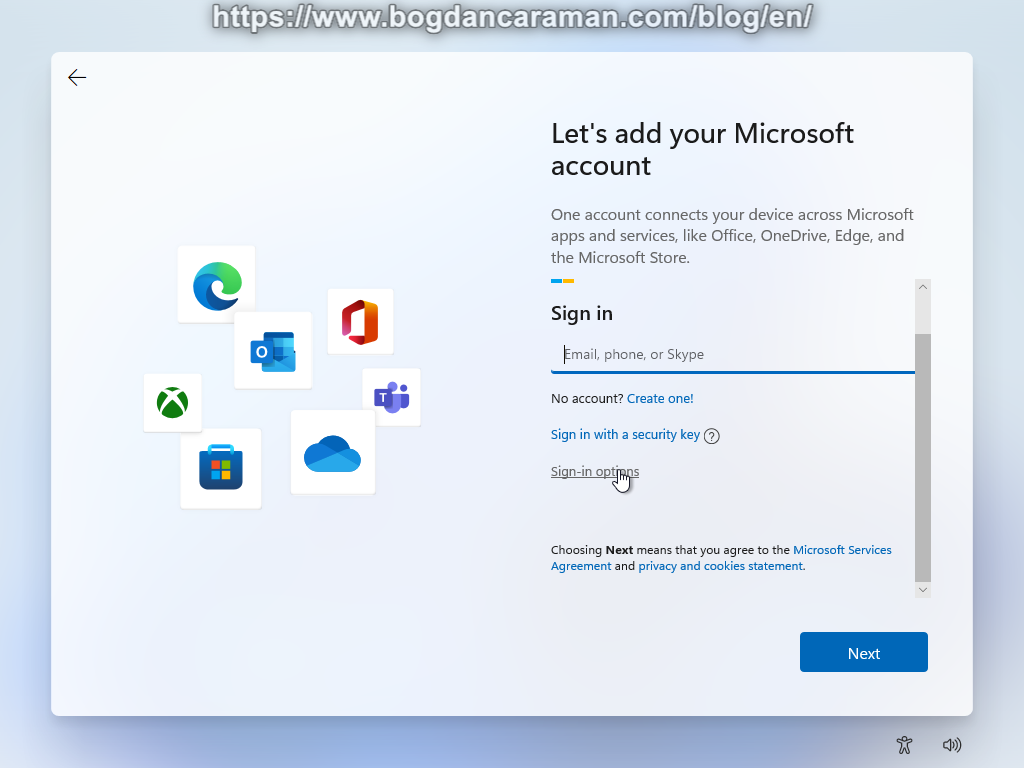
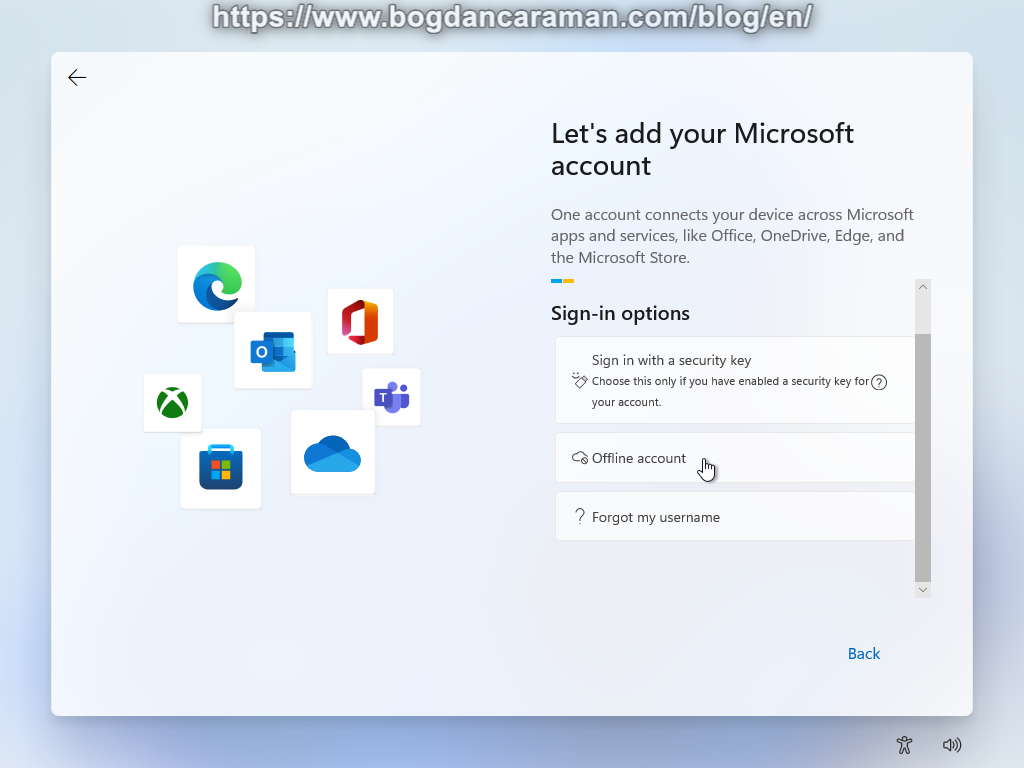
- You can Sign in with Microsoft or use an Offline account (Sign-in options);
- If the Offline account was selected from “Sign-in options“;
- “Skip for now” from “What is a Microsoft account?”;

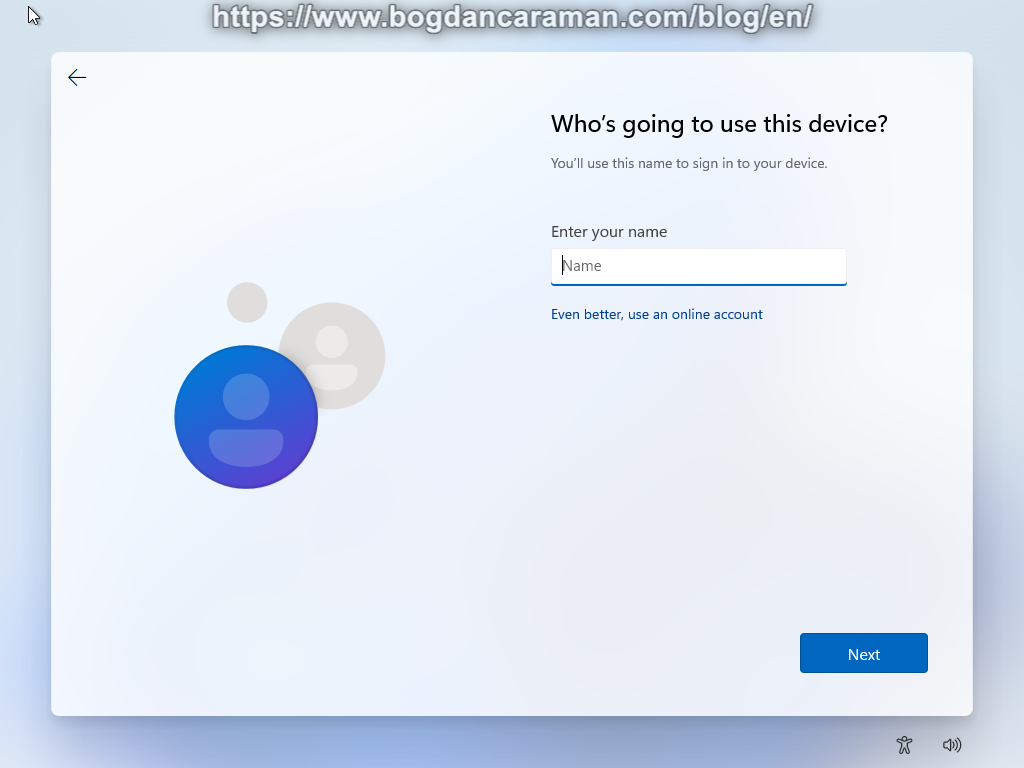
- “Who’s going to use this PC?“, you’ll use this name to sign in to your device, Enter your name and click Next;
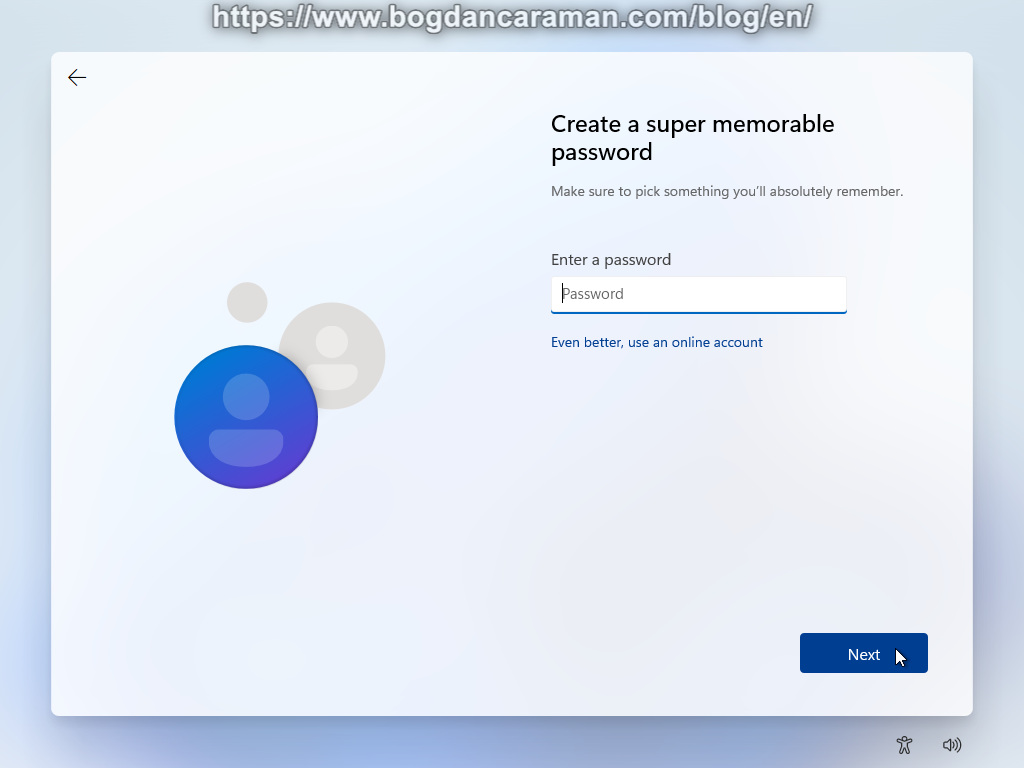
- If you don’t enter a password then you can sign in without a password;
- Choose privacy settings for your device, if Yes then:
- Location:
- Get location-based experiences like directions and weather. Let Windows and apps request your location and allow Microsoft to use your location data to improve location services.
- Find my device:
- Turn on Find my device and use your device’s location data to help you find your device if you lose it. You must sign in to Windows with your Microsoft account to use this feature.
- Diagnostic data:
- Send info about the websites you browse and how you use apps and features, plus enhanced error reporting. Required diagnostic data will always be included when you choose to send Optional diagnostic data.
- Inking & typing:
- Send optional inking and typing diagnostic data to Microsoft to improve the language recognition and suggestion capabilities of Microsoft apps and services.
- Tailored experiences:
- Let Microsoft use your diagnostic data, excluding information about websites you browse, to offer you personalized tips, ads, and recommendations to enhance your Microsoft experiences.
- Advertising ID:
- Apps can use advertising ID to provide more personalized advertising in accordance with the privacy policy of the app provider.
- Location:
- If “No” then:
- Location:
- You won’t be able to get location-based experiences like directions and weather or enjoy other services that require your location to work.
- Find my device:
- Windows won’t be able to help you keep track of your device if you lose it.
- Diagnostic data:
- Send only info about your device, its settings, and capabilities, and whether it is performing properly. Diagnostic data is used to help keep Windows secure and up to date, troubleshoot problems, and make product improvements.
- Inking & typing:
- Don’t use my diagnostic data to help improve the language recognition and suggestion capabilities of Microsoft apps and services.
- Tailored experiences:
- The tips, ads, and recommendations you see will be more generic and may be less relevant to you.
- Advertising ID:
- The number of ads you see won’t change, but they may be less relevant to you.
- Location:
- Accept when privacy settings were chosen;

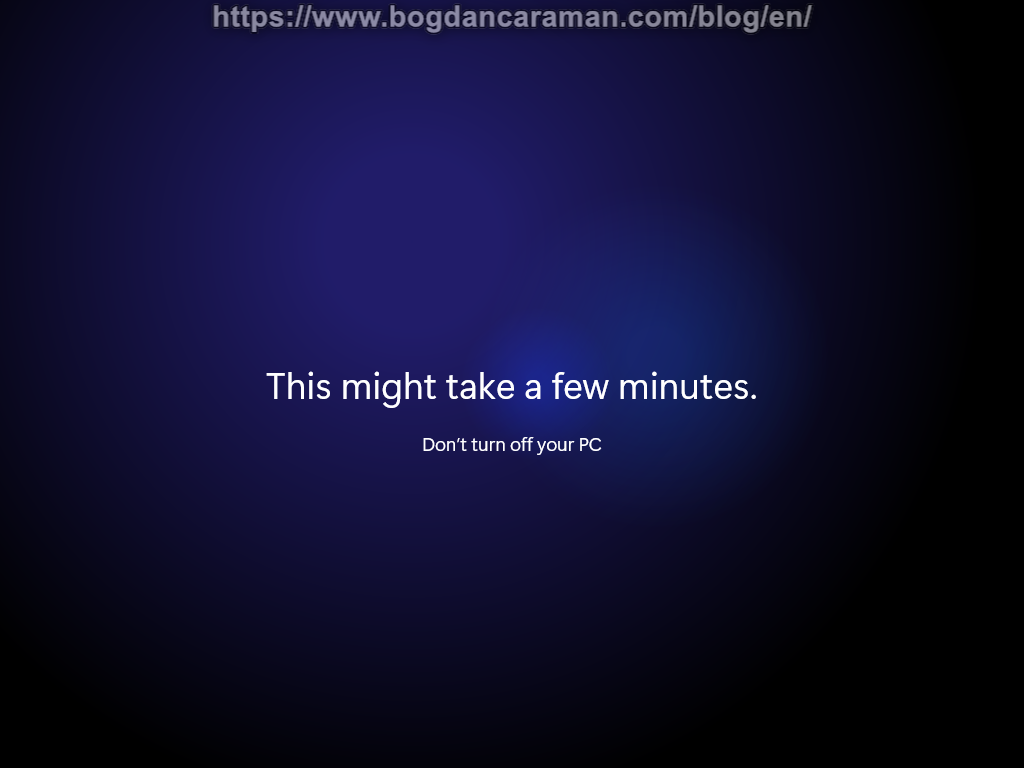
- Don’t turn off your PC till Windows will start;
- Start button on Windows 11;
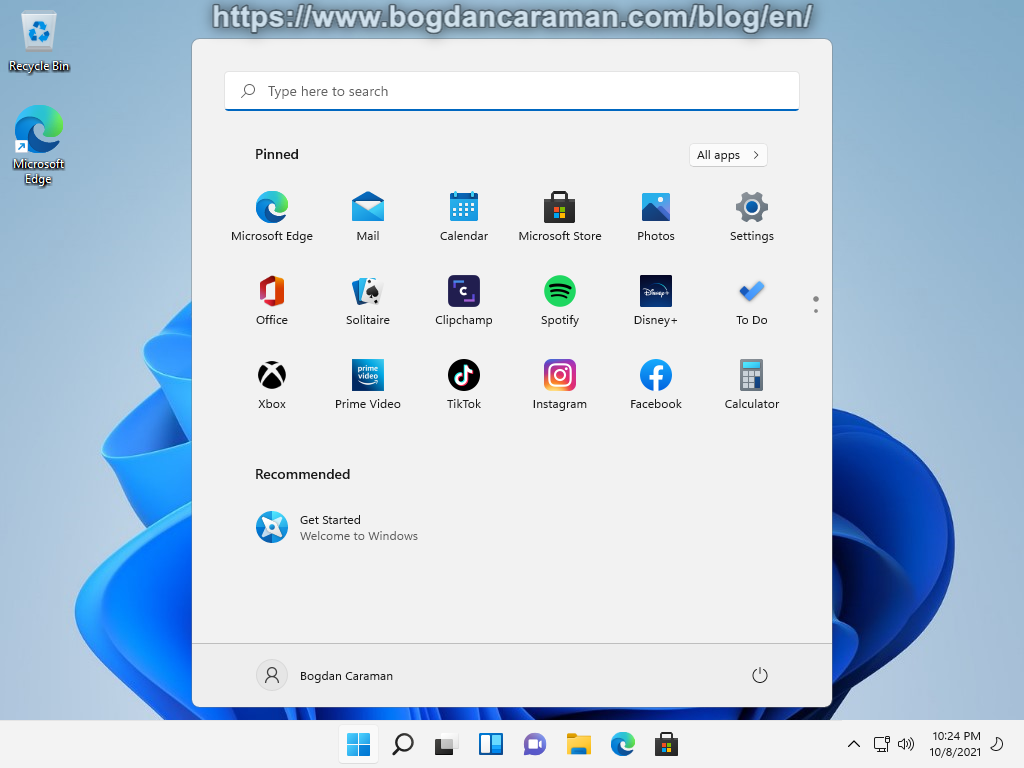
- Desktop on Windows 11;
How to Install Windows 11 on Unsupported PC/Hardware?
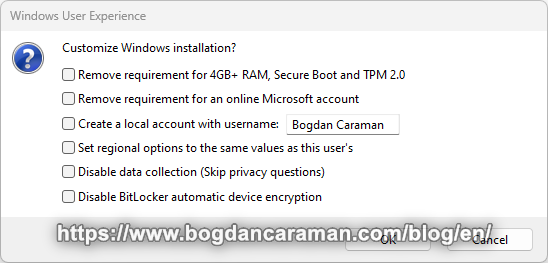
From Rufus, after you hit the START button the Customize Windows Installation appears and you can select “Remove requirement for 4GB+ RAM, Secure Boot and TPM 2.0“.
If you don’t have a Windows 11 product key but you want to test it at home, then you can go to Microsoft Evaluation Center to Download Windows 11 Enterprise Disc Image (ISO File) and use it for 90 days. You can reinstall it after 90 days or you can reset the activation timer to 90 days for the Windows 11 Enterprise through Command Prompt App or Windows Terminal by running the following command line as Administrator:
slmgr.vbs –rearm
So, even if there are 10 days left for this trial period, the command will reset the activation timer to 90 days and not to 100 (10 + 90).
After restarting the operating system the evaluation will continue. To verify how many days you will continue the evaluation run as Administrator in Command Prompt the following command line:
slmgr.vbs -dli
How to Open the Command Prompt or Windows Terminal (Admin) as Administrator in Windows 11?
Press Windows+R to open the “Run” box. Type “cmd” into the box and then press Ctrl+Shift+Enter to run the command as an administrator. Press Windows key + X or just right-clicking the Start button and click to Windows Terminal (Admin).
How to Download and Install Windows 11 24H2 Offline Updates?